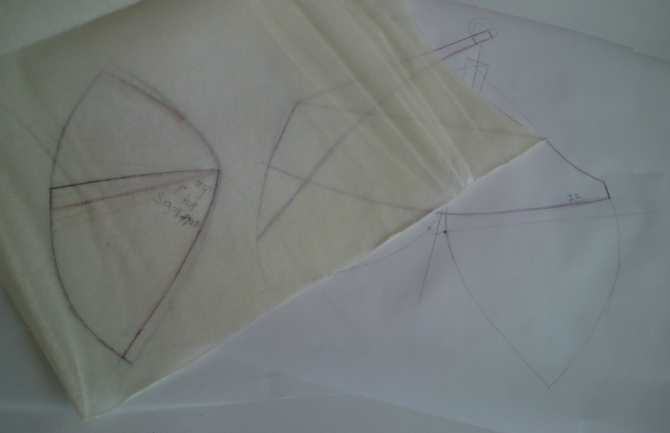
The cup pattern being drawn I will have to make a test to see if it will actually tursn out as expected. Of course I could make a complete bra from lovely fabrics hoping for the best. But I’m developing patterns for many years and know by now it rarely is completely right the first time.
I always start to test a cup with interfacing fleece, ideal for this purpose.
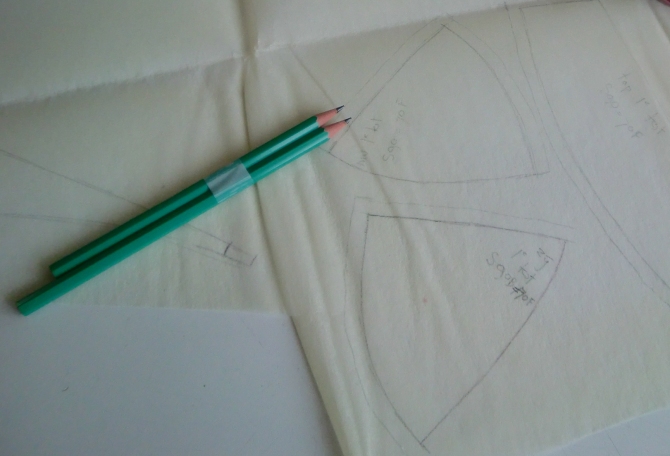
It’s rigid, I can sew it like a fabric, I can write notes on it like on paper and it’s a little sheer. No need to trace and cut the pattern on paper first, I can just trace the whole thing directly on the fleece itself. And of course I add information on each part, which part – which size – which test
For sewing each pattern part needs a seam of 0,75mm. Merckwaerdigh is based in Holland where we use the metric system, not inches. Recently I discovered a need trick to make this process less time consuming, no painstaking measuring involved. I just tape 2 regular pencils together and the space between the sharp points happens to be exactly 0,75cm. HURRAY!!
I only add the seam to the lines I’m actually going to sew now + the line where the underwire will be so I can still attach it to a band if needed. In this case it means no seams at the top edge and arm pit, they would only confuse the view.
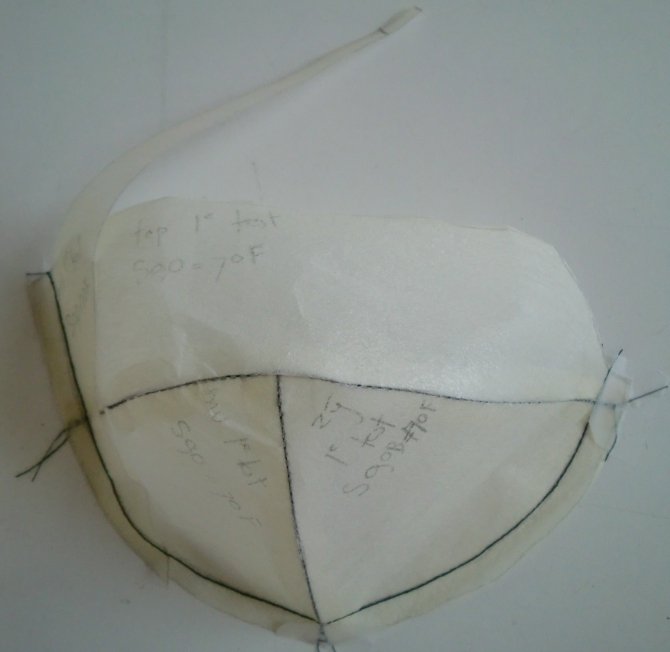
A sewing pattern is always for the left side of the body and each part has to be doubled in fabric. But for a quick test there’s no need for that, just the left cup will do fine to see what it will be like. Once sewn the cup will be kind of a 3D version of the drawing. Well, sewing it is .. I use a simple straight stitch since the fleece doesn’t stretch and sew through the underwire line as well to make clear where the cup itself will end.
Not quite what I was looking for … the cups seems a bit pointy to me. This could be caused by the almost vertical seam in the under cup since cups with vertical coupe always are a bit pointy. An aslant coupe will usually flatten the cup so next step will be to make a test this way.
For an overview of all the Merckwaerdigh internet activities take a look at www.merckwaerdigh.nl


Pingback: How to draft new bra CUP designs with the Merckwaerdigh e-course – My Blog
Pingback: How to shift the bra Coupe Line to HORIZONTAL in the Merckwaerdigh e-course – My Blog
Pingback: How to shift the bra Coupe Line to HORIZONTAL in the Merckwaerdigh e-course | Merckwaerdigh Blog
Pingback: How to draft new bra CUP designs with the Merckwaerdigh e-course | Merckwaerdigh Blog
Where can I find lining fleece? I’m having a difficult time explaining what I want in my fabrics store…
Thank you so much for yours posts!
LikeLike
It is interlining fleece and people use it mainly for some stiffening in collars and jackets.
LikeLike
I can only find polar fleece for sweaters and jackets. What do you think about using 1mm thickness felt fabric? Too thick? Thank you for your help.
Rita, I couldn’t use a reply button so I’ll add this to your message. Felt fabric might be a bit too stiff. Non-woven (fleece) interlining (or interfacing) should be available in fabric stores or stores selling sewing machines. Best regards, Margreet van Dam
LikeLike
Yes, this is so interesting and informative. Thank you for sharing. It’s fun to feel part of the process.
LikeLiked by 1 person
So interesting to see the development process. Looking forward to the final pattern. Thanks for sharing!
LikeLiked by 1 person
How nice to share the development of a pattern in a blog. Looks like it’s a pattern made for my measurments (E/F 75). I’ll be following your progress and looking forward to the launch of your pattern. Good luck.
LikeLiked by 2 people